Prepare for Google Health BYOO application
Last updated: July 14, 2026
Use this guide to prepare a self-owned Google Cloud project and OAuth application for Google Health through Junction.
A self-owned callback is required
Google requires your organization to prove control or ownership of every Authorized Domain used by your OAuth application, including domains used for:
The application homepage
The privacy policy and terms of service
Authorized JavaScript origins, if configured
Authorized OAuth redirect URIs
You cannot use a Junction-owned domain as the redirect URI for your BYOO application because your organization cannot complete Google's domain verification for that domain.
Instead, host a lightweight OAuth callback forwarder on a domain your organization owns and has verified. Google redirects the user to your domain, and your endpoint forwards the unchanged OAuth response to Junction.
Important: The callback forwarder is a required part of the Google Health BYOO setup. It is not an optional customization. More information on this can also be found here: https://docs.junction.com/wearables/connecting-providers/bring-your-own-oauth/callback-endpoints.
Setup Steps: Prepare your Google Cloud Project for Google Health BYOO
Before you begin
You need:
A Google Cloud project owned by your organization
A Google account that is a Project Owner for that project
Administrative access to the DNS records for your organization's domain
Public pages for your application homepage, privacy policy, and terms of service
Google's current setup instructions require a Web application / Web Server OAuth client for the Google Health API, even if your product is a native mobile application.
1. Create or select a Google Cloud project
Sign in to the Google Cloud console using an account that administers the project.
Create a dedicated project, or select an existing project your organization owns.
Enable the Google Health API.
Record the project's project ID and project number. Junction's launch-time setup will require the project number for Google Health subscriber management.
Google's setup guide: Set up Google Cloud and OAuth
2. Configure the OAuth application branding
In Google Auth Platform > Branding, configure:
Application name
User support email
Application logo
Application homepage
Privacy policy URL
Terms of service URL
Developer contact information
For an external production application, the homepage, privacy policy, and terms links must be public and must use domains your organization owns and can verify.
Your homepage should clearly identify the application, explain its user-facing purpose, and link to the same privacy policy shown on the OAuth consent screen. The privacy policy should explain how your application accesses, uses, stores, and shares Google Health data.
3. Verify your domain with Google
Assume your OAuth callback will be hosted at:
<https://auth.example.com/oauth/callback/google_health>Verify the registrable root domain, example.com. You do not need to verify auth.example.com separately.
Add a Domain property in Google Search Console
Sign in to Google Search Console using the Google account that is a Project Owner of your Google Cloud project.
Open the property selector and choose Add property.
Select Domain. Do not select URL prefix.
Enter the root domain, for example
example.com.Copy the TXT record supplied by Google.
Add the TXT record to the domain's DNS configuration.
Wait for DNS propagation, then select Verify in Search Console.
Keep the TXT record in DNS after verification. Removing it can prevent Google from confirming ownership later.
Add the domain to the OAuth application
Return to Google Auth Platform > Branding in the same Google Cloud project.
Under Authorized domains, add the root domain, for example
example.com.Confirm that every URL used by the application is hosted on that domain or one of its subdomains.
Repeat this process for every additional domain used by the OAuth application. Keep the list minimal. Google limits an application to ten authorized domains.
Google's domain-verification guidance: Domain Verification
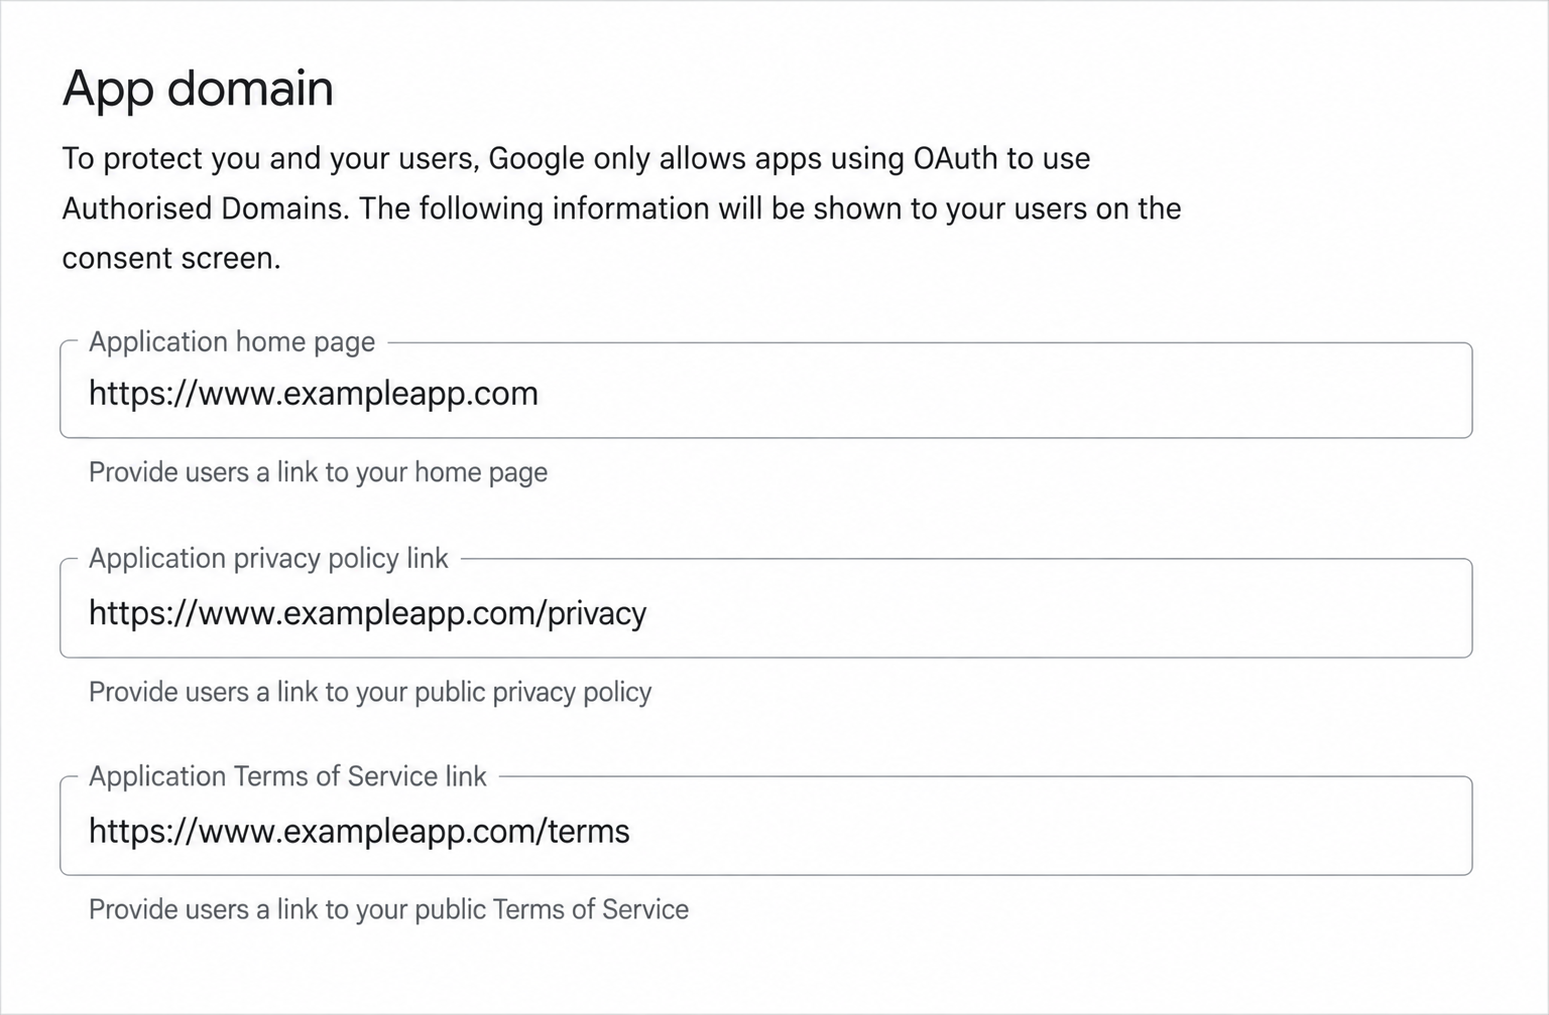
Here is an example of the App domains form under Branding settings, with home page, privacy policy, and terms of service URLs using the https://www.exampleapp.com domain.
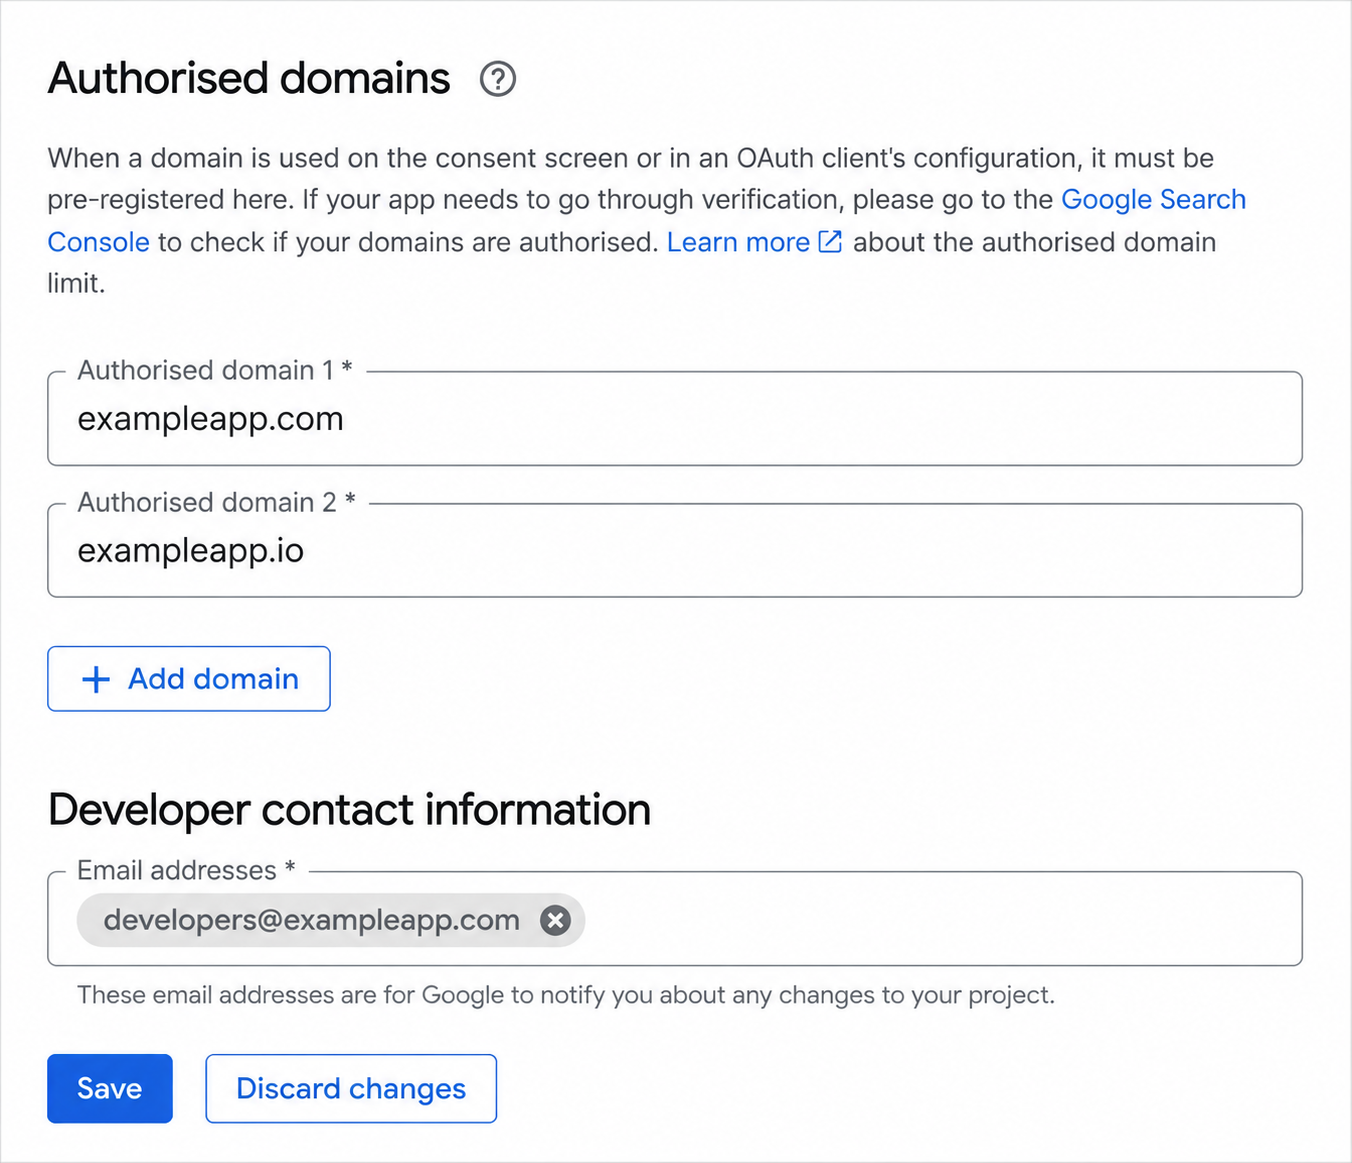
This is the form for authorized domains. Before submitting branding and permission verification requests, ensure all required domains are added here.
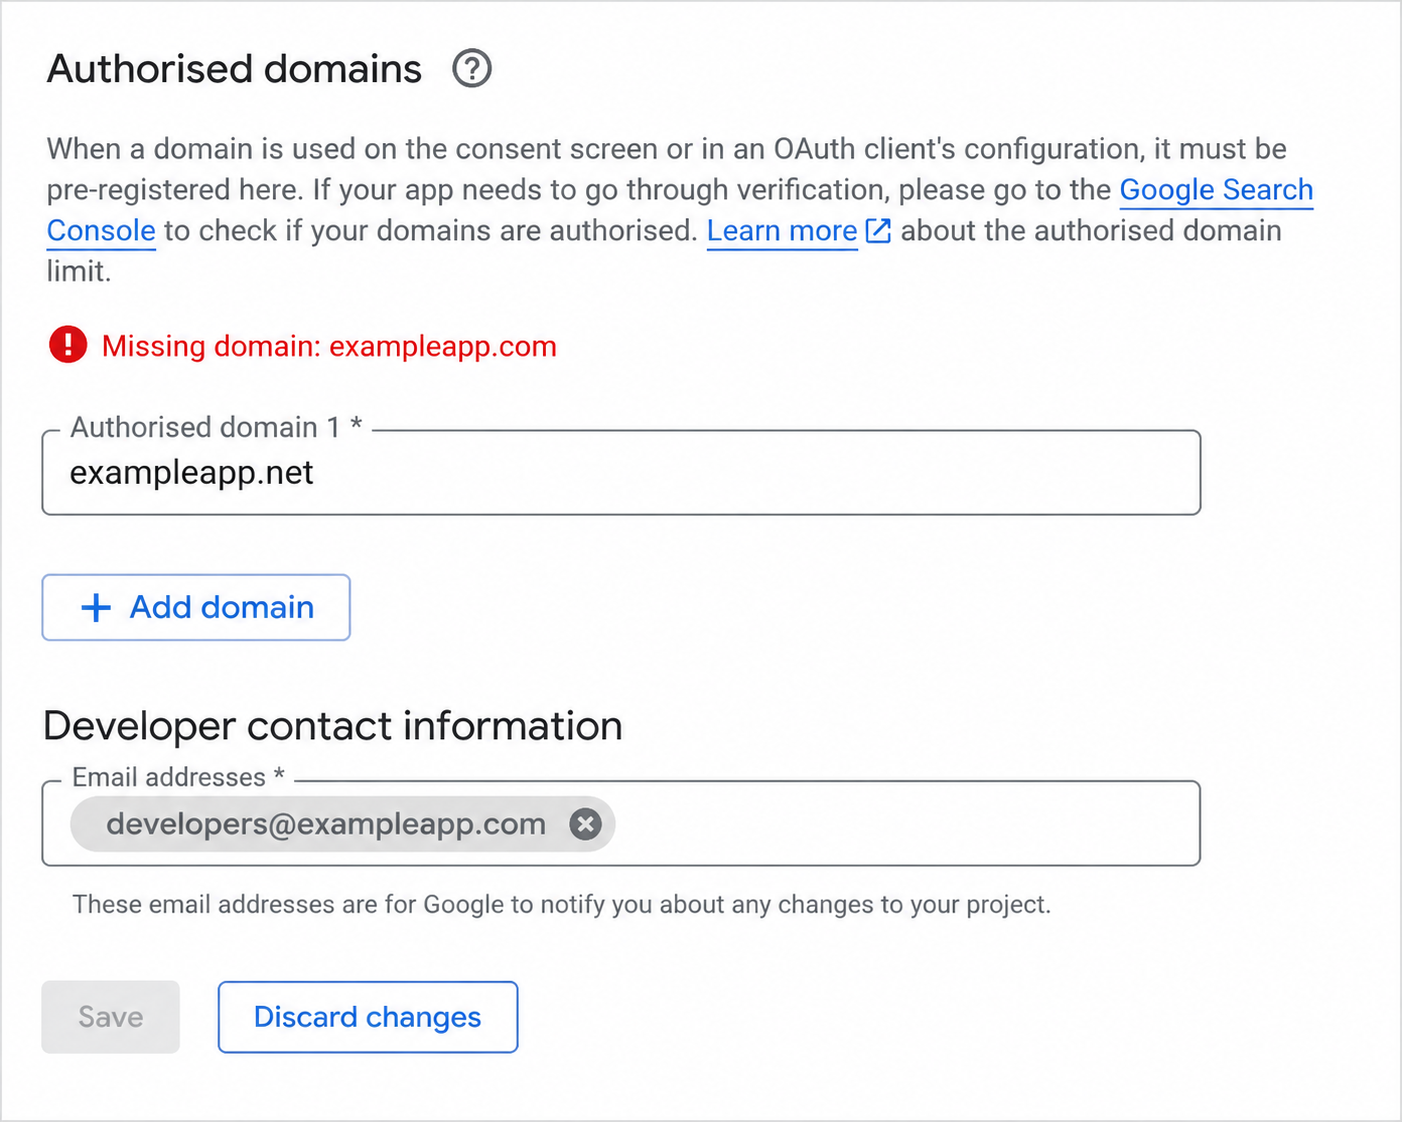
This is what the form would look like if a domain declared in App domains (exampleapp.com) or redirect URIs (see 5.) is not included in authorised domains:
4. Host the OAuth callback forwarder
Deploy an HTTPS endpoint on the verified domain. For example:
<https://auth.example.com/oauth/callback/google_health>The endpoint must:
Accept Google's OAuth callback as an HTTP
GETrequestPreserve the complete query string without parsing, changing, or re-encoding it
Return
307 Temporary RedirectRedirect to the Junction Google Health callback for the correct environment
Example:
Incoming request:
GET /oauth/callback/google_health?code=abc123&state=xyz

Response:
HTTP/1.1 307 Temporary Redirect
Location: <https://api.us.junction.com/v2/link/connect/google_health?code=abc123&state=xyz>
Use the corresponding Junction target:
Environment | Junction target |
|---|---|
Sandbox US |
|
Sandbox EU |
|
Production US |
|
Production EU |
|
Do not use 302 Found, and do not reconstruct the query parameters. The state value must reach Junction unchanged. Implementation details: Hosting OAuth Callbacks on Your Own Domain
5. Create the Google OAuth client
In Google Auth Platform > Clients, create an OAuth client.
Select Web application as the application type. Google's guided setup labels this option Web Server.
Add your customer-owned callback URL under Authorized redirect URIs:
<https://auth.example.com/oauth/callback/google_health>Save the client.
Record the OAuth client ID and client secret securely.
Google's quick-start documentation uses https://www.google.com as a temporary redirect URI. Do not use that value for the Junction production configuration. Replace it with your verified, customer-owned callback URL.
The redirect URI must match exactly in all three places:
Google Auth Platform
Your Junction custom-credential redirect URI override
The
redirect_uriused by Junction during the authorization-code exchange
Differences in scheme, hostname, path, casing, or a trailing slash cause redirect_uri_mismatch errors.
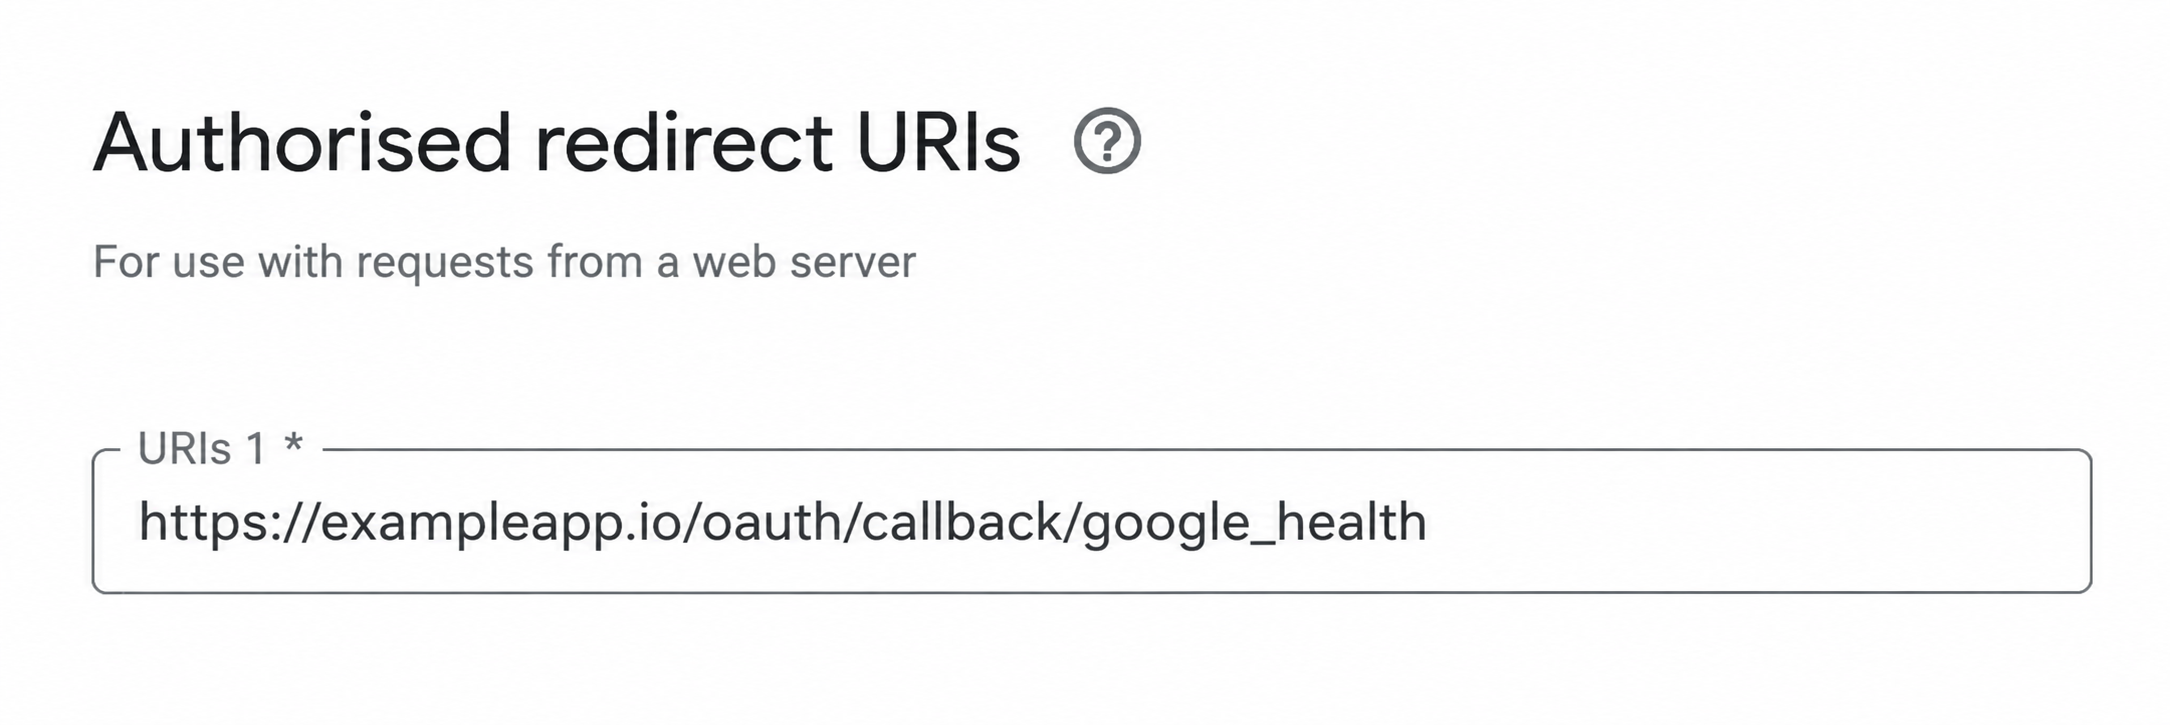
The Redirect URI field is located under OAuth client settings. Please enter the URL of your OAuth callback forwarder hosted on your authorized domain:
What happens after launch?
At launch, we’ll publish the complete Google Health BYOO setup guide covering:
Adding your OAuth credentials and project details to Junction
Configuring the required service account and IAM roles
Testing the complete authorization and data-access flow
Recording the demonstration video and submitting your production application for verification
Junction will manage the Google Health subscriber and Google-facing webhook endpoint. Customers will continue receiving data through Junction’s normal webhook flow and will not need to configure separate Google Health webhook infrastructure.