Patient Self-Scheduling & Lab Order Page — Product Guide
Last updated: November 5, 2026
You can now turn on the Patient Portal yourself in the Junction Dashboard. Go to Team settings and switch on the Patient experience toggle. See Getting Started below for the steps.
Overview
The Patient Portal (shown as Patient experience in the Dashboard) is a secure, white-labeled experience that allows patients to schedule their lab appointment, understand what’s been ordered, and know what to expect at the lab — all through a unique, order-specific link.
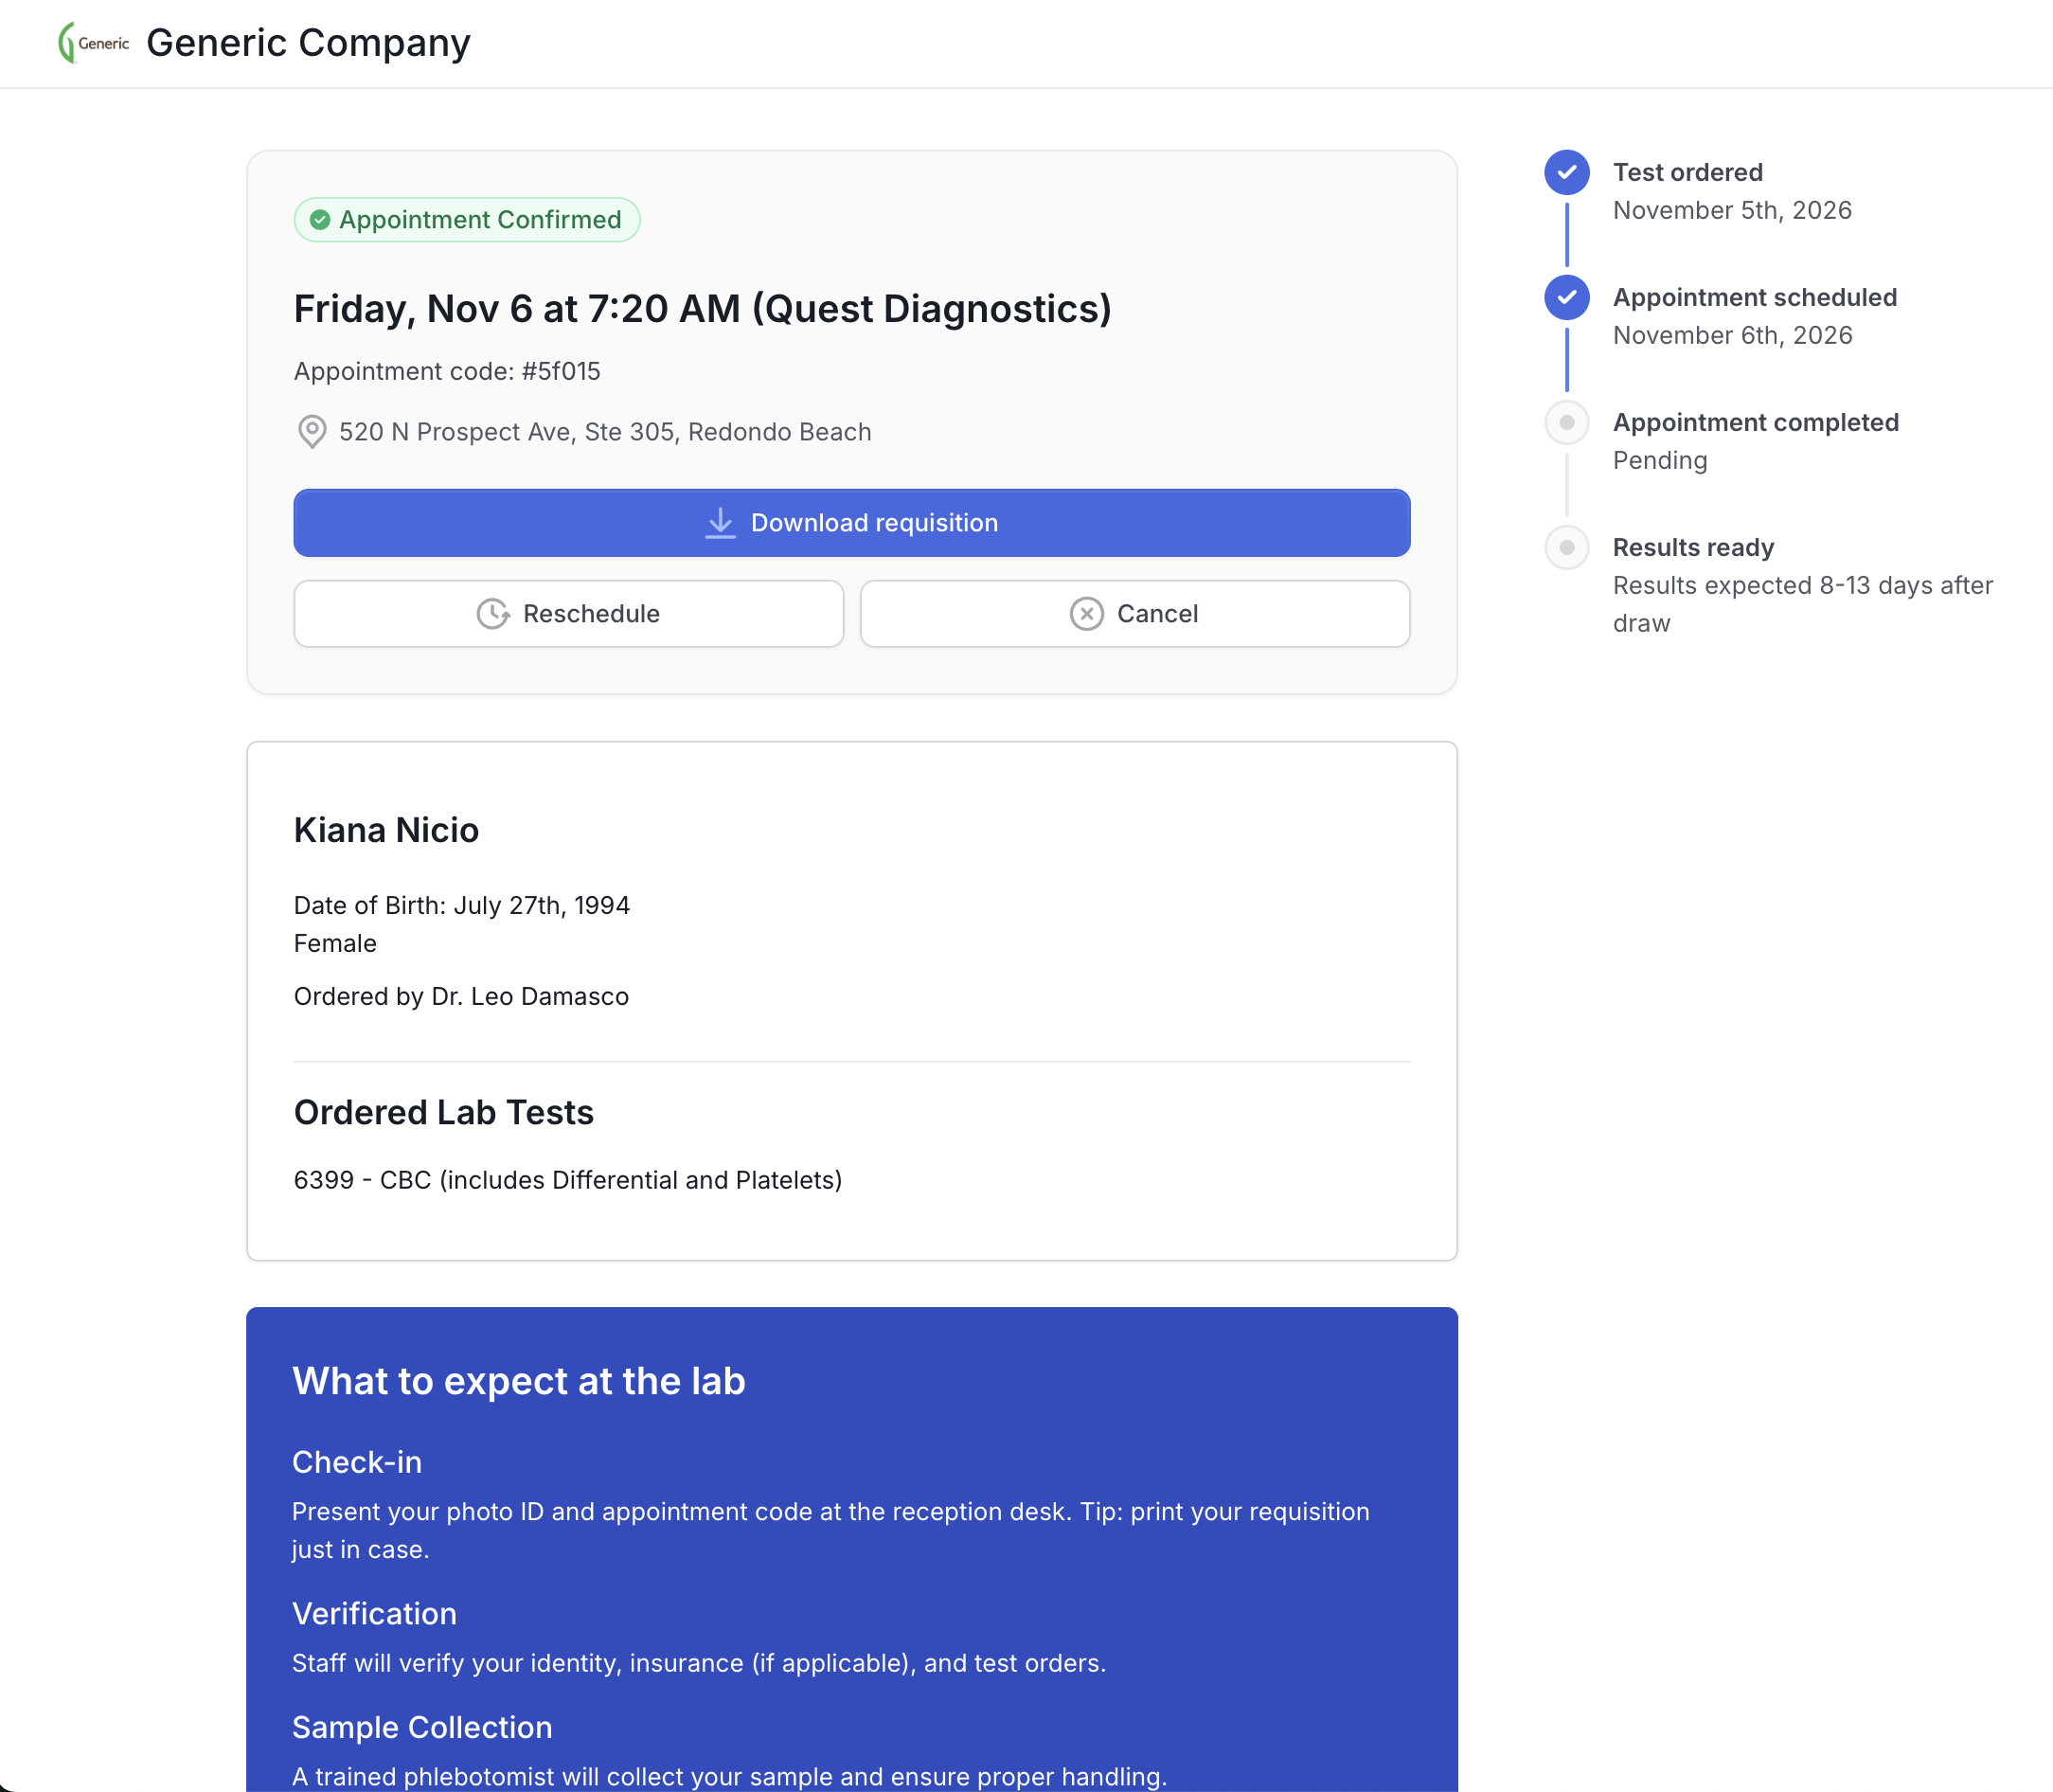
The Patient Portal is available for walk-in lab orders. Orders using at-home phlebotomy or on-site collection do not use the Patient Portal.
Customers can use the Patient Portal in two ways:
Automatically, via Junction’s email and SMS notifications (no engineering work required), or
Manually, by generating a Portal URL via the Junction API and linking out from their own product
The Portal is designed to reduce friction to collection, increase appointment booking, and improve overall lab utilization. Patients who book an appointment are much more likely to complete their lab draw than those who walk in without one.
What the Patient Portal Enables
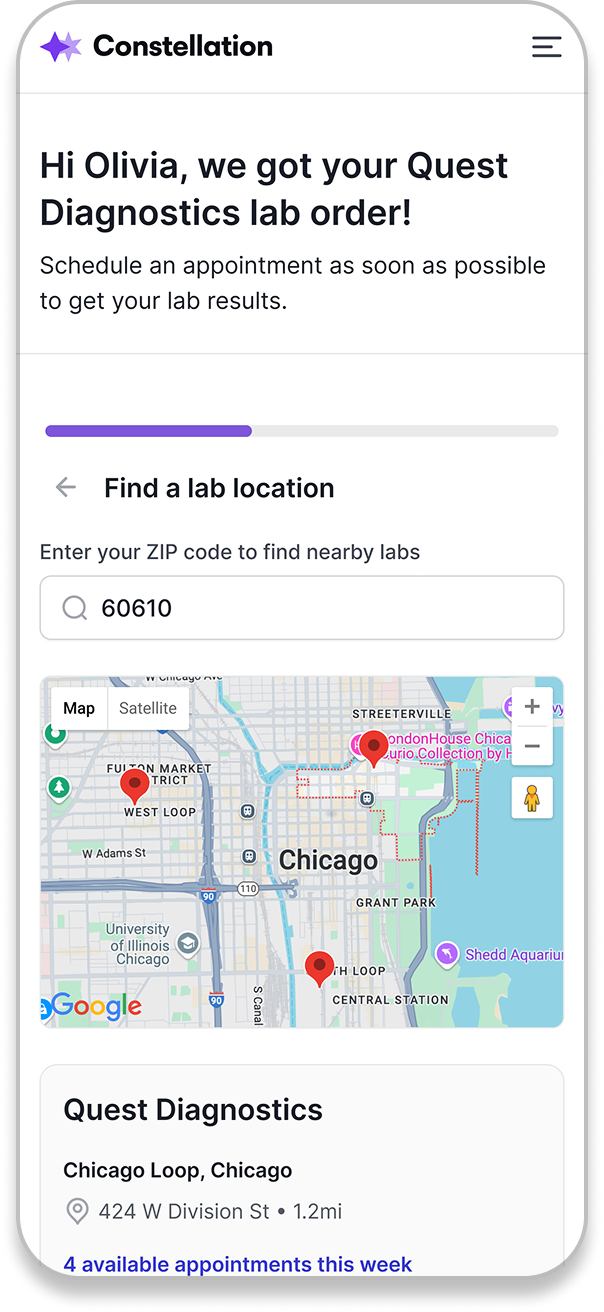
With the Patient Portal, patients can:
Securely access their lab order
Schedule a Quest PSC appointment directly on page
View appointment details (location, date, time, confirmation code)
Track order progress
See expected lab turnaround time for results
Review tests ordered and fasting requirements
Understand what to expect at the lab
Download their lab requisition
Access help if they get stuck
All within a mobile-friendly, branded experience hosted by Junction.
For Labcorp and BioReference orders, the appointment booking button opens a new tab in the patient's browser for scheduling on the labs' external websites. Direct on-page scheduling is coming soon.
How Patients Access the Patient Portal
Option 1: Junction Email & SMS (Default, No Engineering Required)
If you use Junction’s patient email and SMS notifications:
A unique Patient Portal link is automatically generated
The link is included in:
Order confirmation messages
SMS appointment reminders, if enabled for your team (see below)
Patients simply tap the link to access their Portal
This is the fastest way to get started and requires no API work.
When the Patient Portal is on, walk-in patients receive the Requisition created (portal link) SMS, which includes their Portal link. You can preview this message, and edit it if you'd like, in Team settings > Communication > Walk-in lab before you turn the Portal on. See 📄 Customize patient SMS messages (SMS white-labeling).
Option 2: Generate the Portal Link via API (Optional)
For customers who want to surface the Portal inside their own product experience, you can generate the link yourself using the Junction API and link out to it.
The Patient Portal frontend is hosted by Junction and opens as a new page. It is not an embeddable module or iFrame in the MVP.
SMS Appointment Reminders
SMS appointment reminders pair with the Patient Portal to nudge patients to book, and then show up for, their lab appointment. Each reminder includes the patient's Portal link. Reminders are sent by SMS only; no reminder emails are sent.
SMS appointment reminders are enabled separately from the Patient Portal. Reach out to your Customer Success Manager to turn them on.
Before an appointment is booked
After the requisition is created, Junction schedules these reminders:
Timing | Default message |
|---|---|
24 hours | Lab appointments can fill up fast. Booking now helps you avoid long wait times: {portal link}. Reply STOP to opt out. |
72 hours | Still need to book your lab? It only takes a minute and guarantees your spot: {portal link}. Reply STOP to opt out. |
7 days | There's a lab appointment available at {nearby PSC address}. Use this booking link before it is gone: {portal link}. Reply STOP to opt out. |
If no nearby Patient Service Center address is available, the 7-day reminder instead lets the patient know their lab order is still open and includes the booking link.
Booking reminders stop as soon as the patient books an appointment. No further booking reminders are sent after day 7.
After an appointment is booked through Junction
Timing | Default message |
|---|---|
24 hours before | Reminder: You have a lab appointment tomorrow at {appointment time}. View details: {portal link}. Reply STOP to opt out. |
2 hours before | Your lab appointment at {appointment address} is in 2 hours. Don't forget to account for traffic and parking on your way in. To reschedule: {portal link}. Reply STOP to opt out. |
A few details:
If an appointment is booked less than 24 hours ahead, the 24-hour reminder is skipped.
Rescheduling automatically recalculates the reminder times.
Cancelling an appointment clears any pending appointment reminders.
Customizing reminder messages
You can customize each reminder yourself in the Junction Dashboard. Go to Team settings > Communication, choose the Walk-in lab tab, and select a reminder under Reminders. For each one you can keep Junction's default text, write your own, or turn it off. See 📄 Customize patient SMS messages (SMS white-labeling) for a walkthrough, and 📄 SMS Template Parameters for the fields you can use.
📸 NEW SCREENSHOT NEEDED: Example SMS appointment reminder on a patient's phone.
Authentication & Security
Authentication depends on how the portal link is delivered:
A) If the link is delivered via Junction comms (Email/SMS)
Patients must verify their identity using 6-digit OTP verification.
Flow:
Patient opens the Portal link
Patient chooses one of two verification methods:
Email me a 6-digit code, or
Text me a 6-digit code
The code is sent to the patient’s pre-populated email address or phone number from the order
Patient enters the code to proceed
Notes:
The patient can only send the code to the contact info on the order
No passwords, accounts, or long-term logins
If a patient accesses the Patient Portal via a Junction-generated short link, they only need to complete verification once per device.
B) If the link is generated via the Junction API
There are two distinct API-based behaviors:
Case 1: Portal URL generated with patient context (pre-authenticated)
If the customer generates the Portal URL via the Junction API and passes the required patient context:
The patient is pre-authenticated
No OTP verification is required
The Portal opens directly
This is intended for customers who:
Already authenticate patients in their own product
Want a seamless link-out experience
Control how and when the link is shared
Case 2: Short link generated without patient context
If a short link is generated without patient context:
The patient must authenticate using a 6-digit OTP
OTP is sent via Junction email or SMS
⚠ Important:
Sending OTP codes requires Junction white-labeled email and/or SMS to be enabled. Customers who do not have Junction comms enabled cannot currently complete OTP delivery.
Patient Experience Flow (for Quest orders)
Step 1: Patient opens their unique Portal link (with authentication) to view their lab order and is prompted to schedule an appointment
Step 2: Patient's zip code is pre-populated from the order information to present convenient lab PSC's for their collection
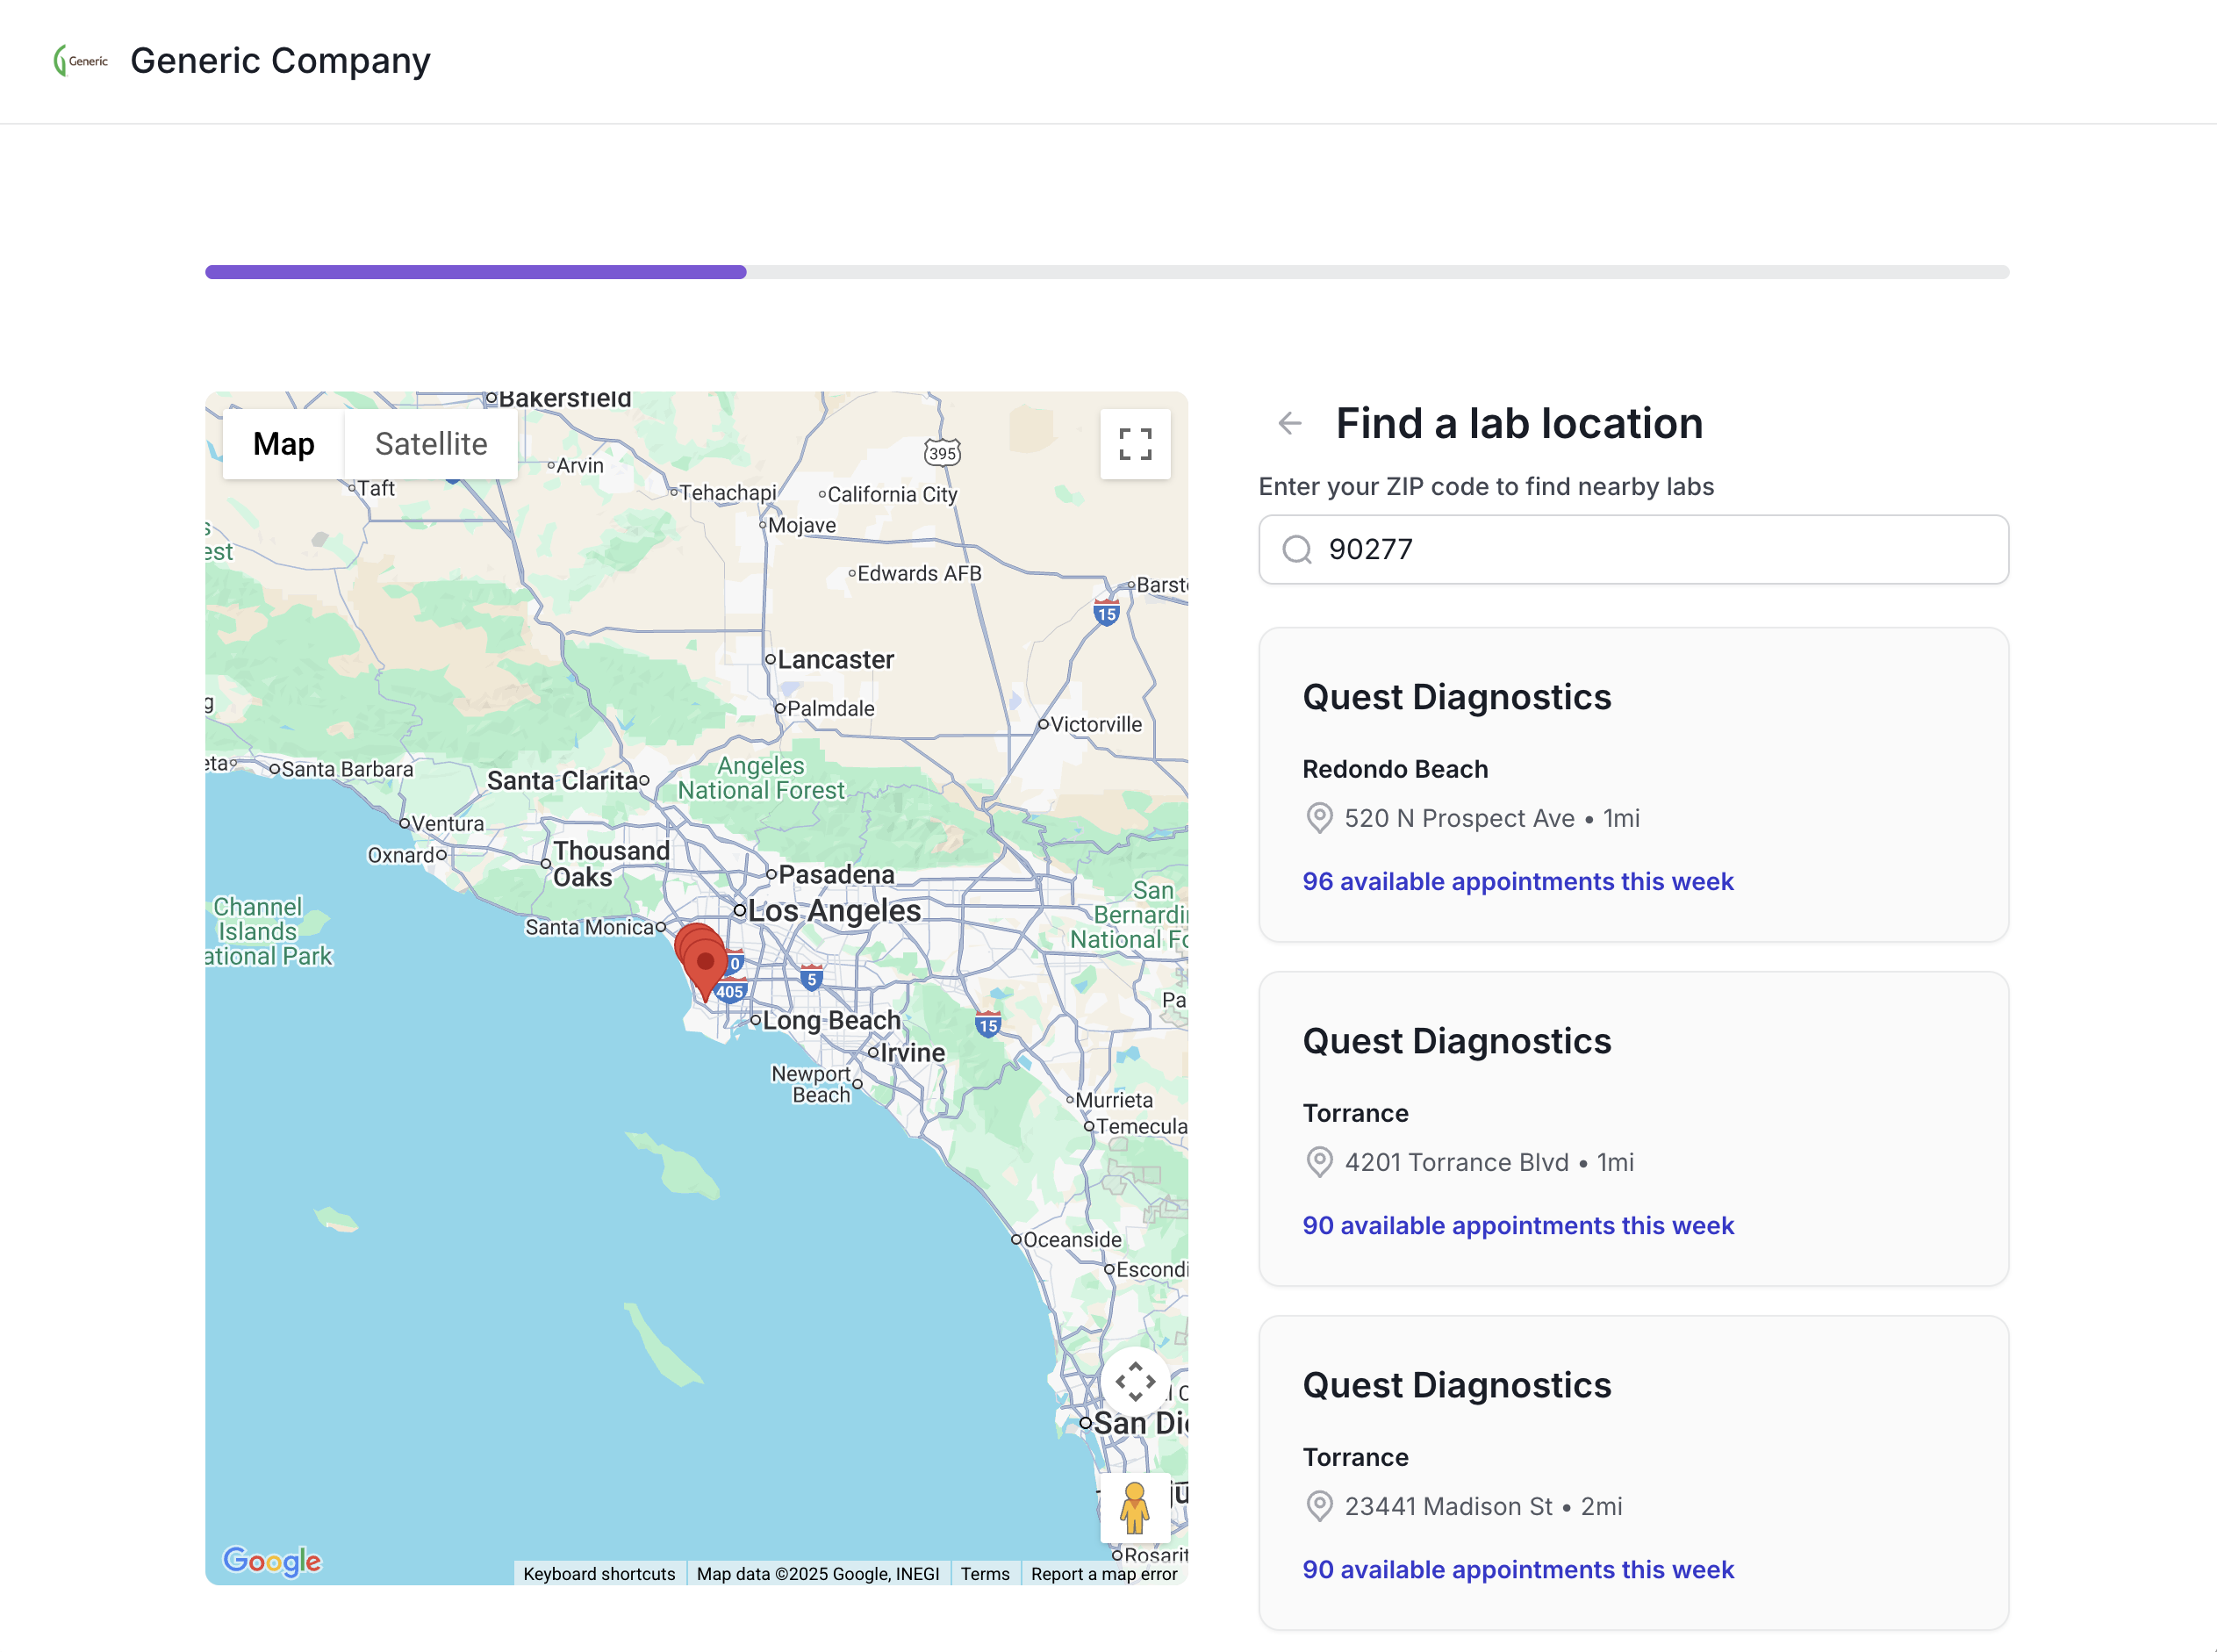
Step 3: Patient selects a convenient location, date, and time
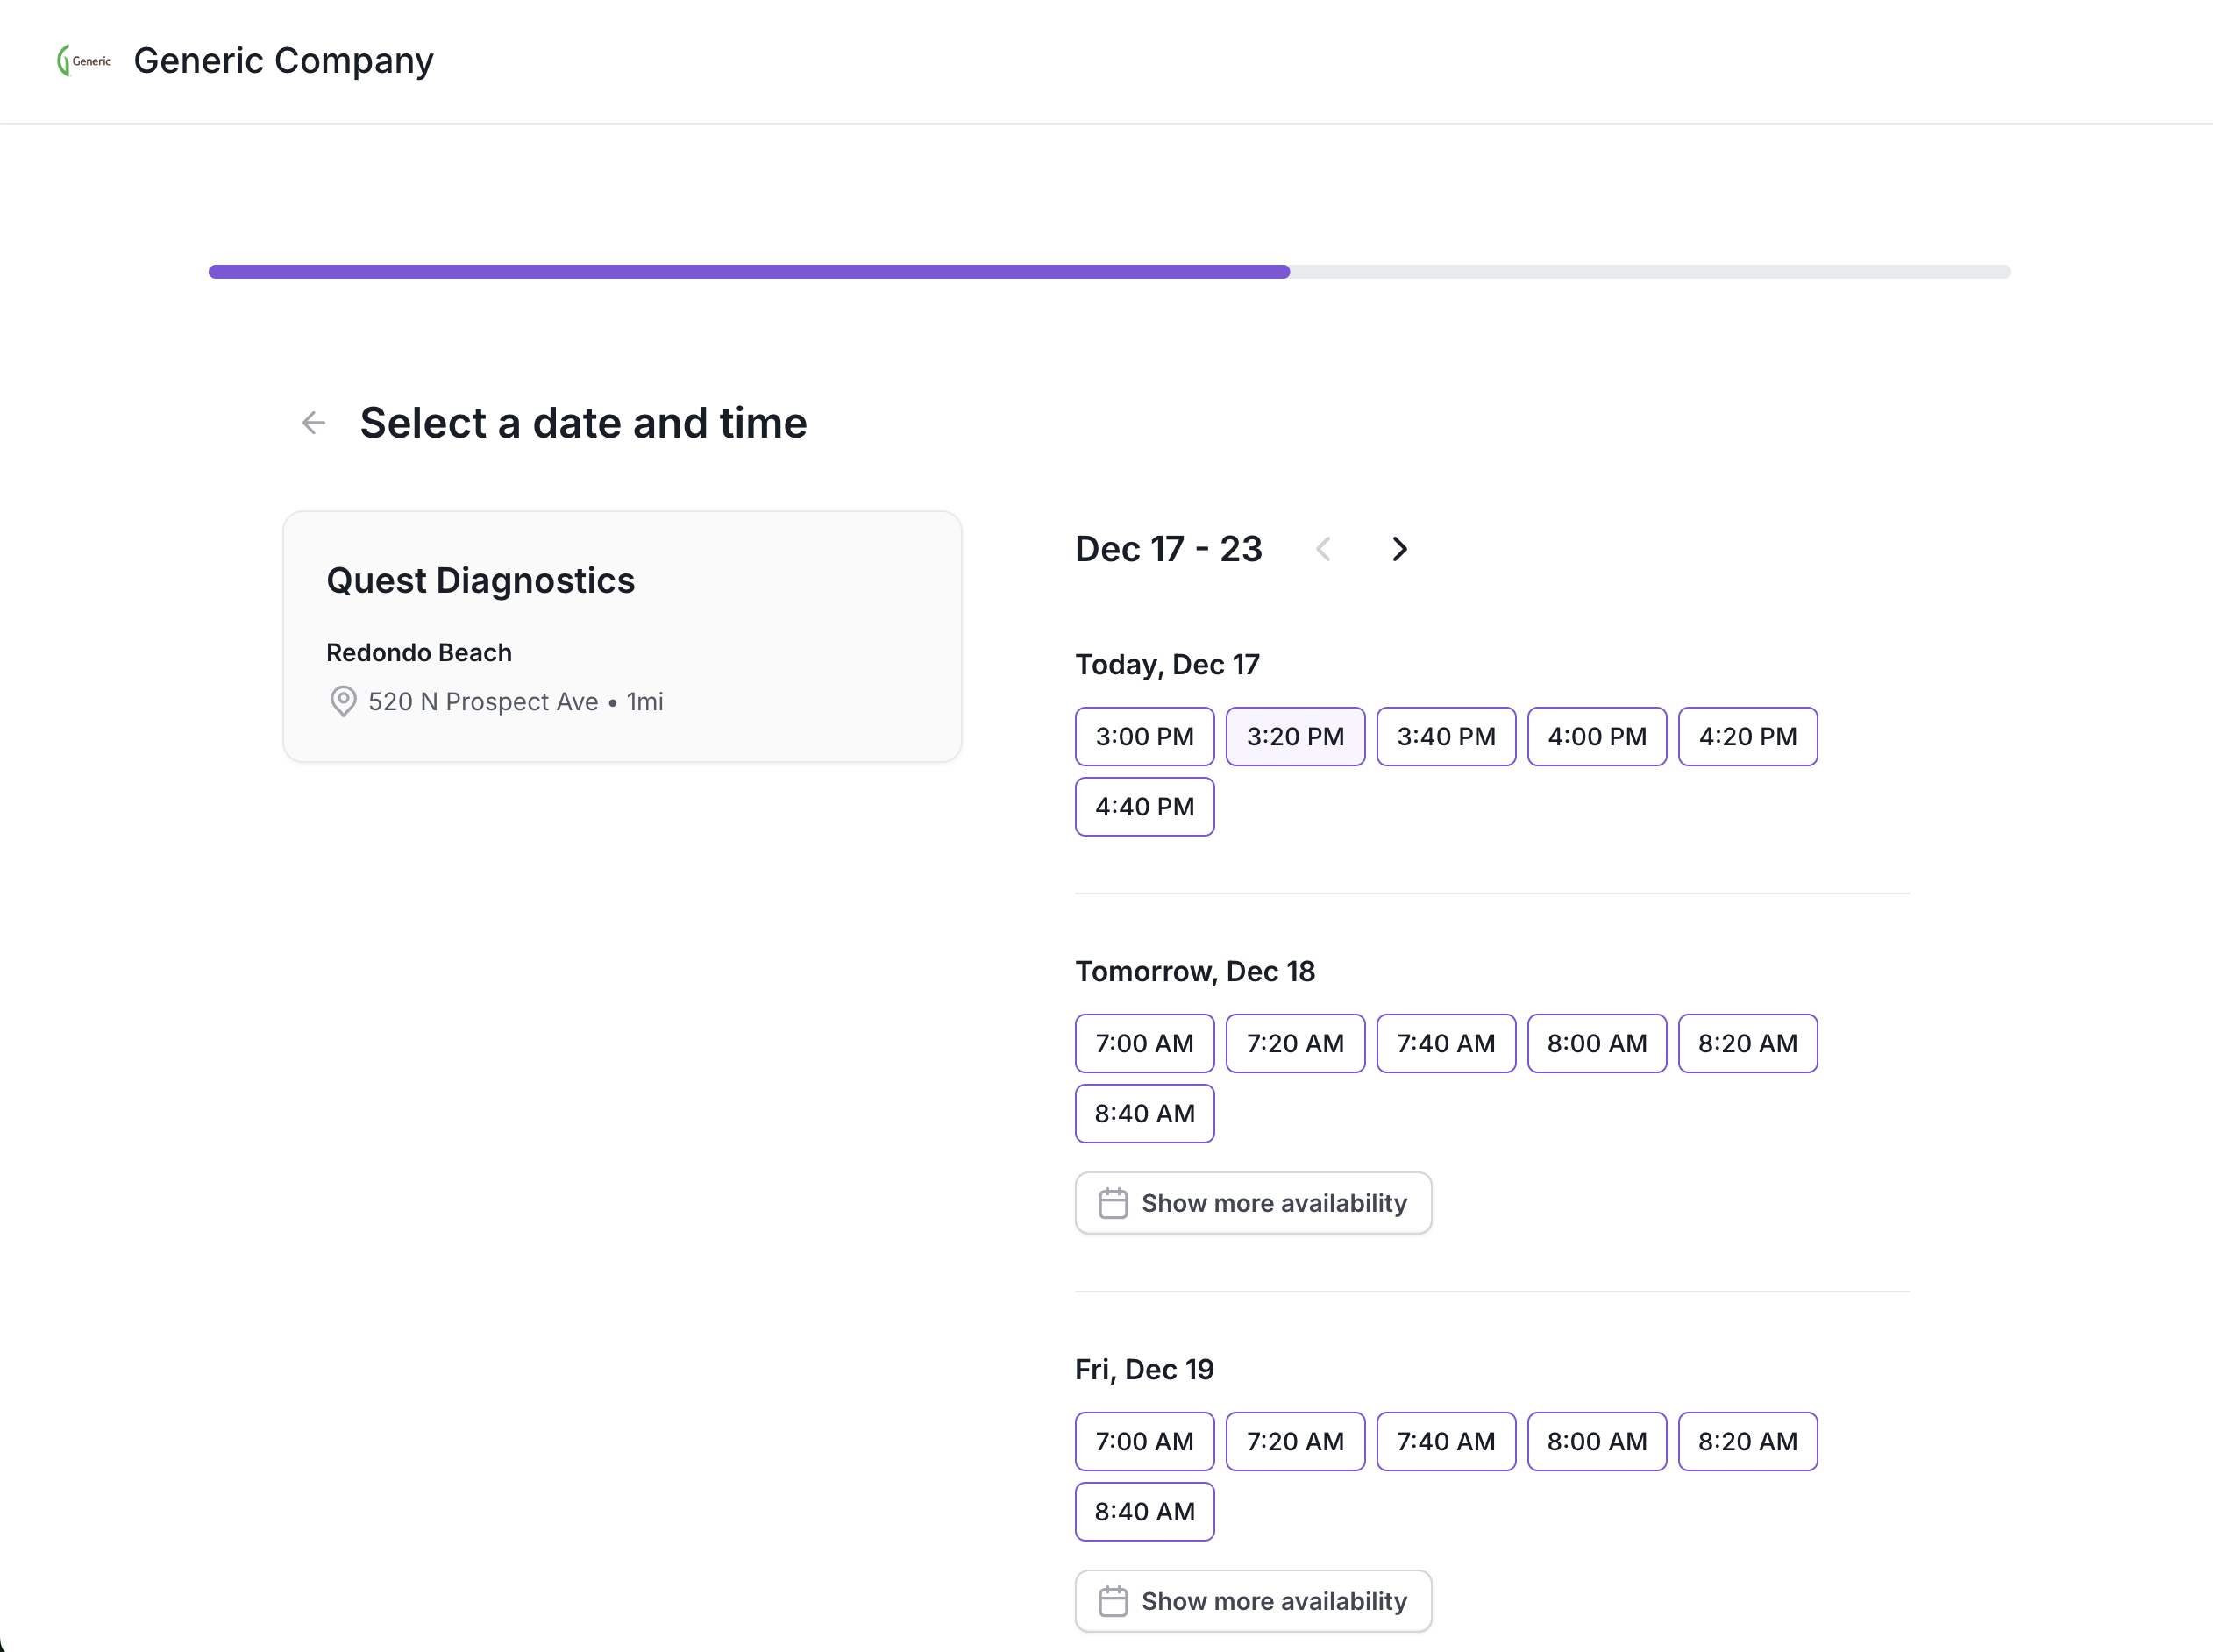
Step 4: Patient reviews and confirms appointment
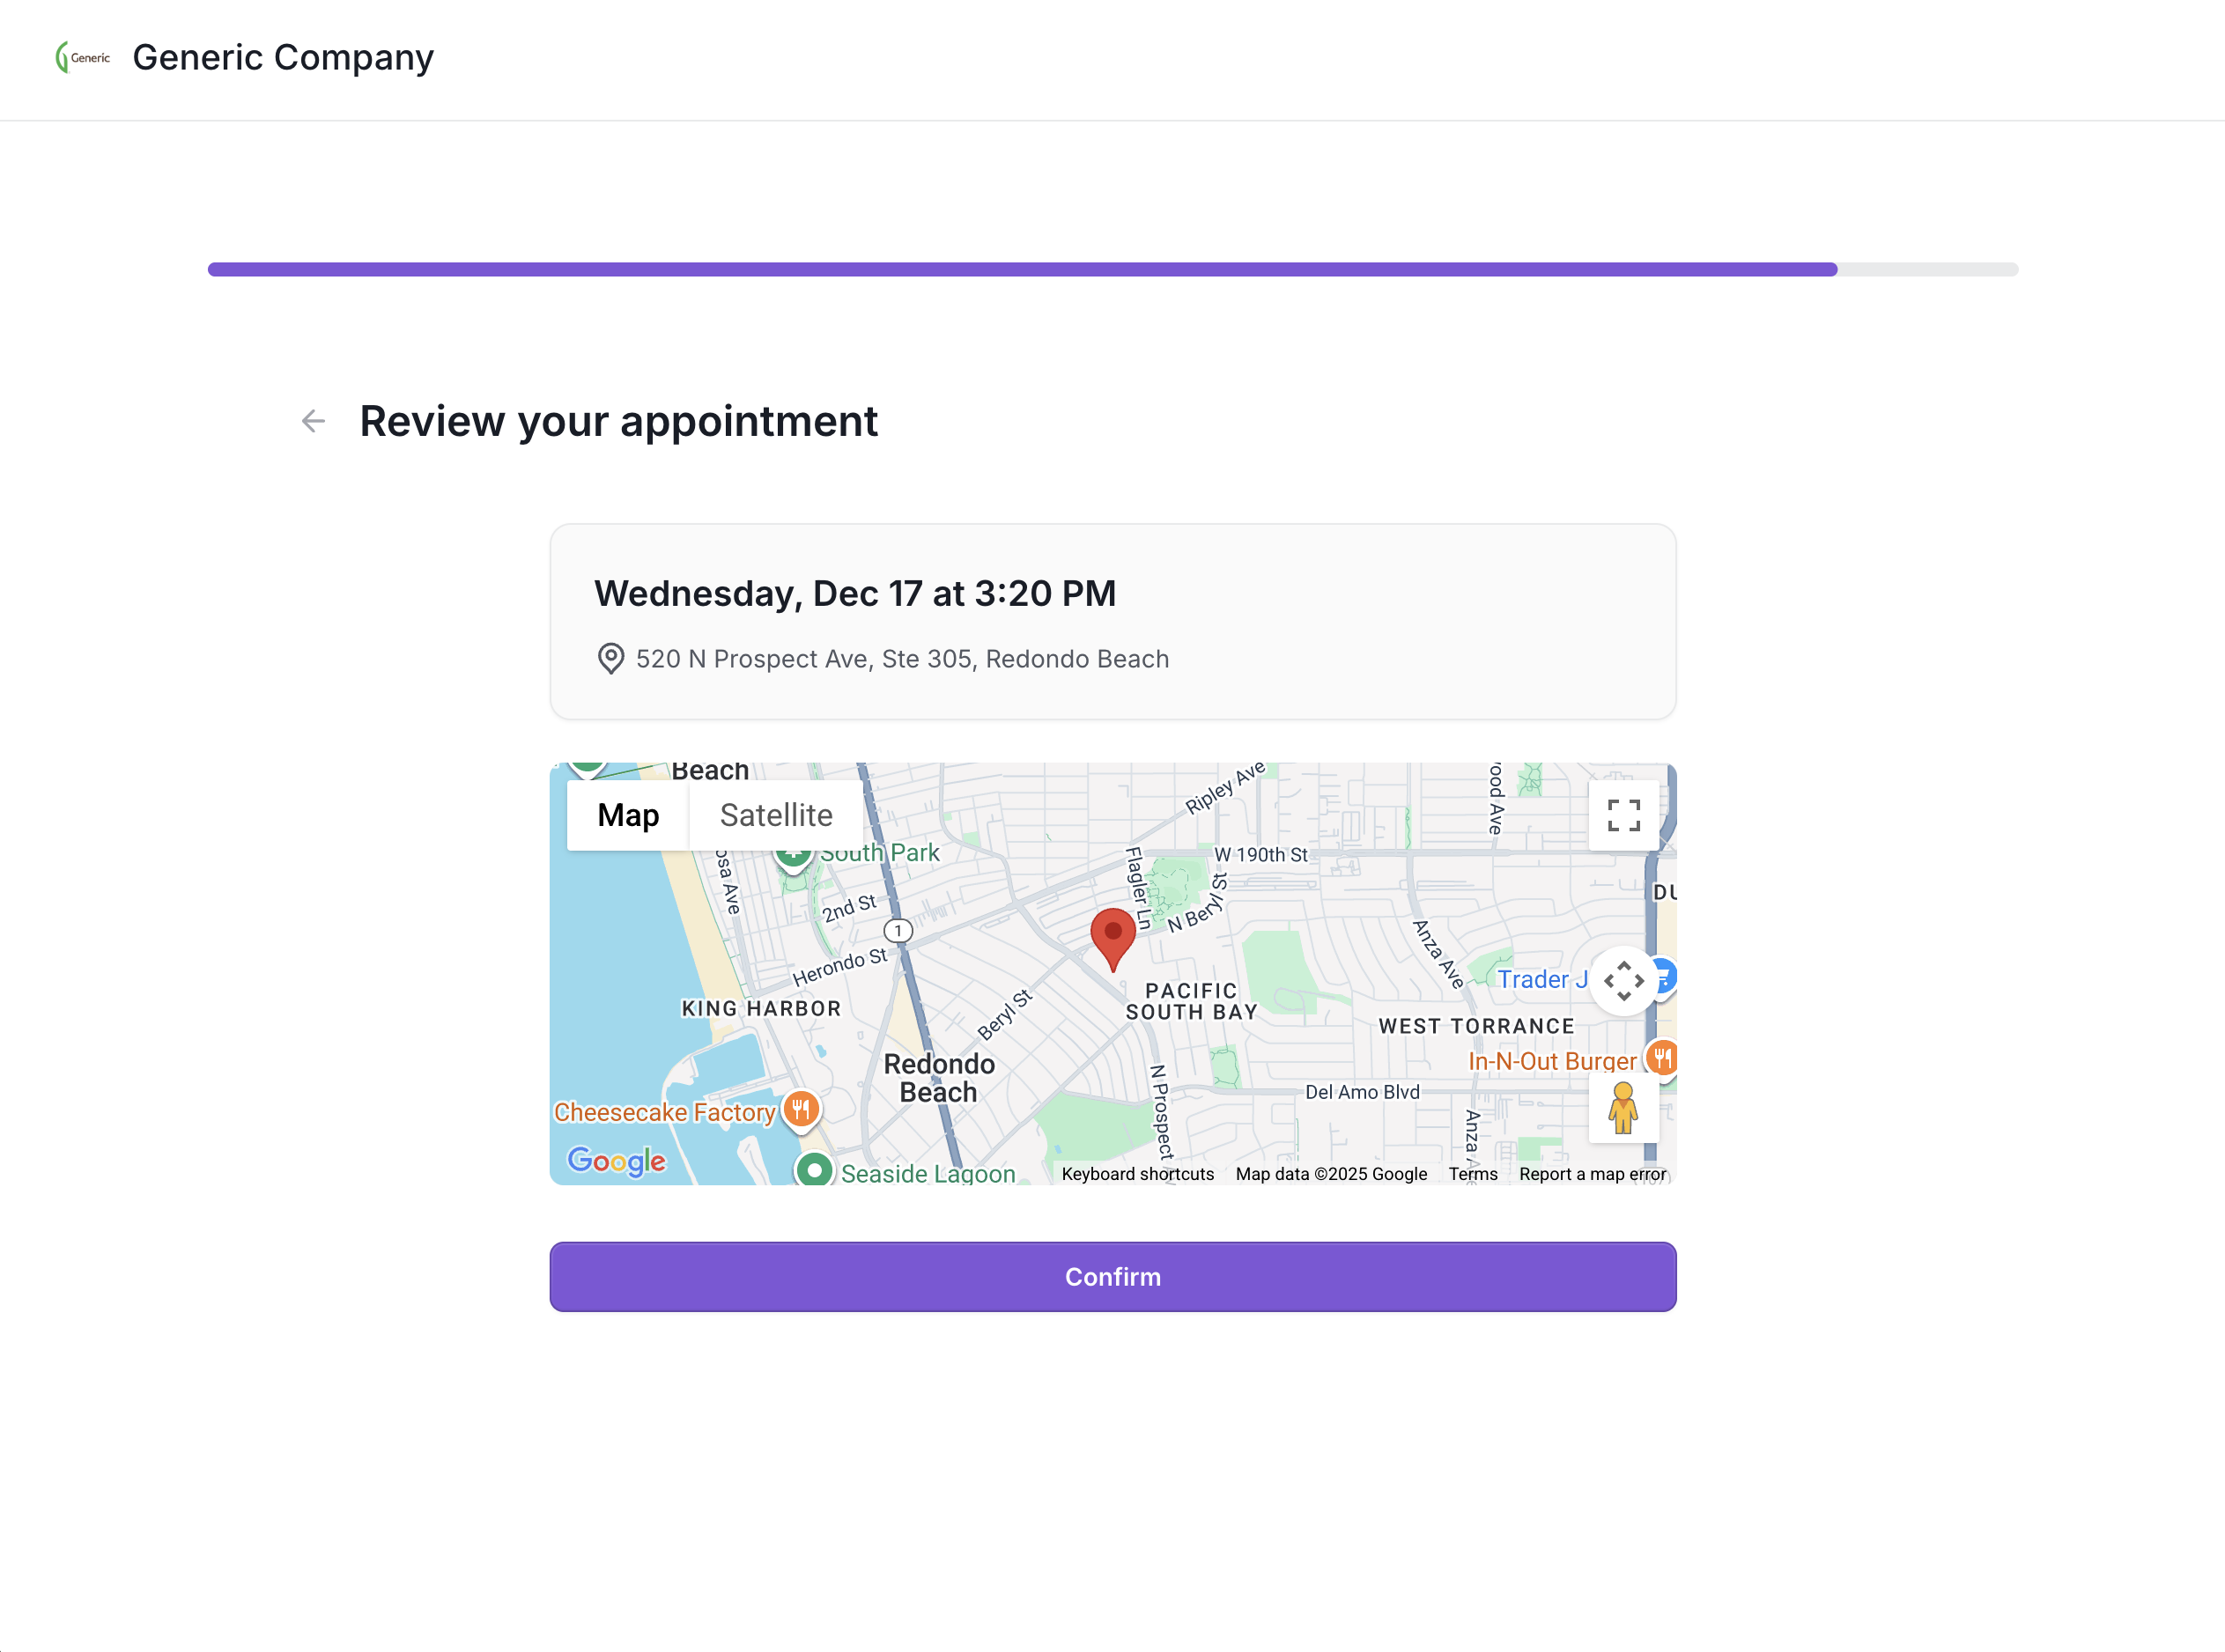
Step 5: Appointment is confirmed with an appointment code and progress bar is updated.
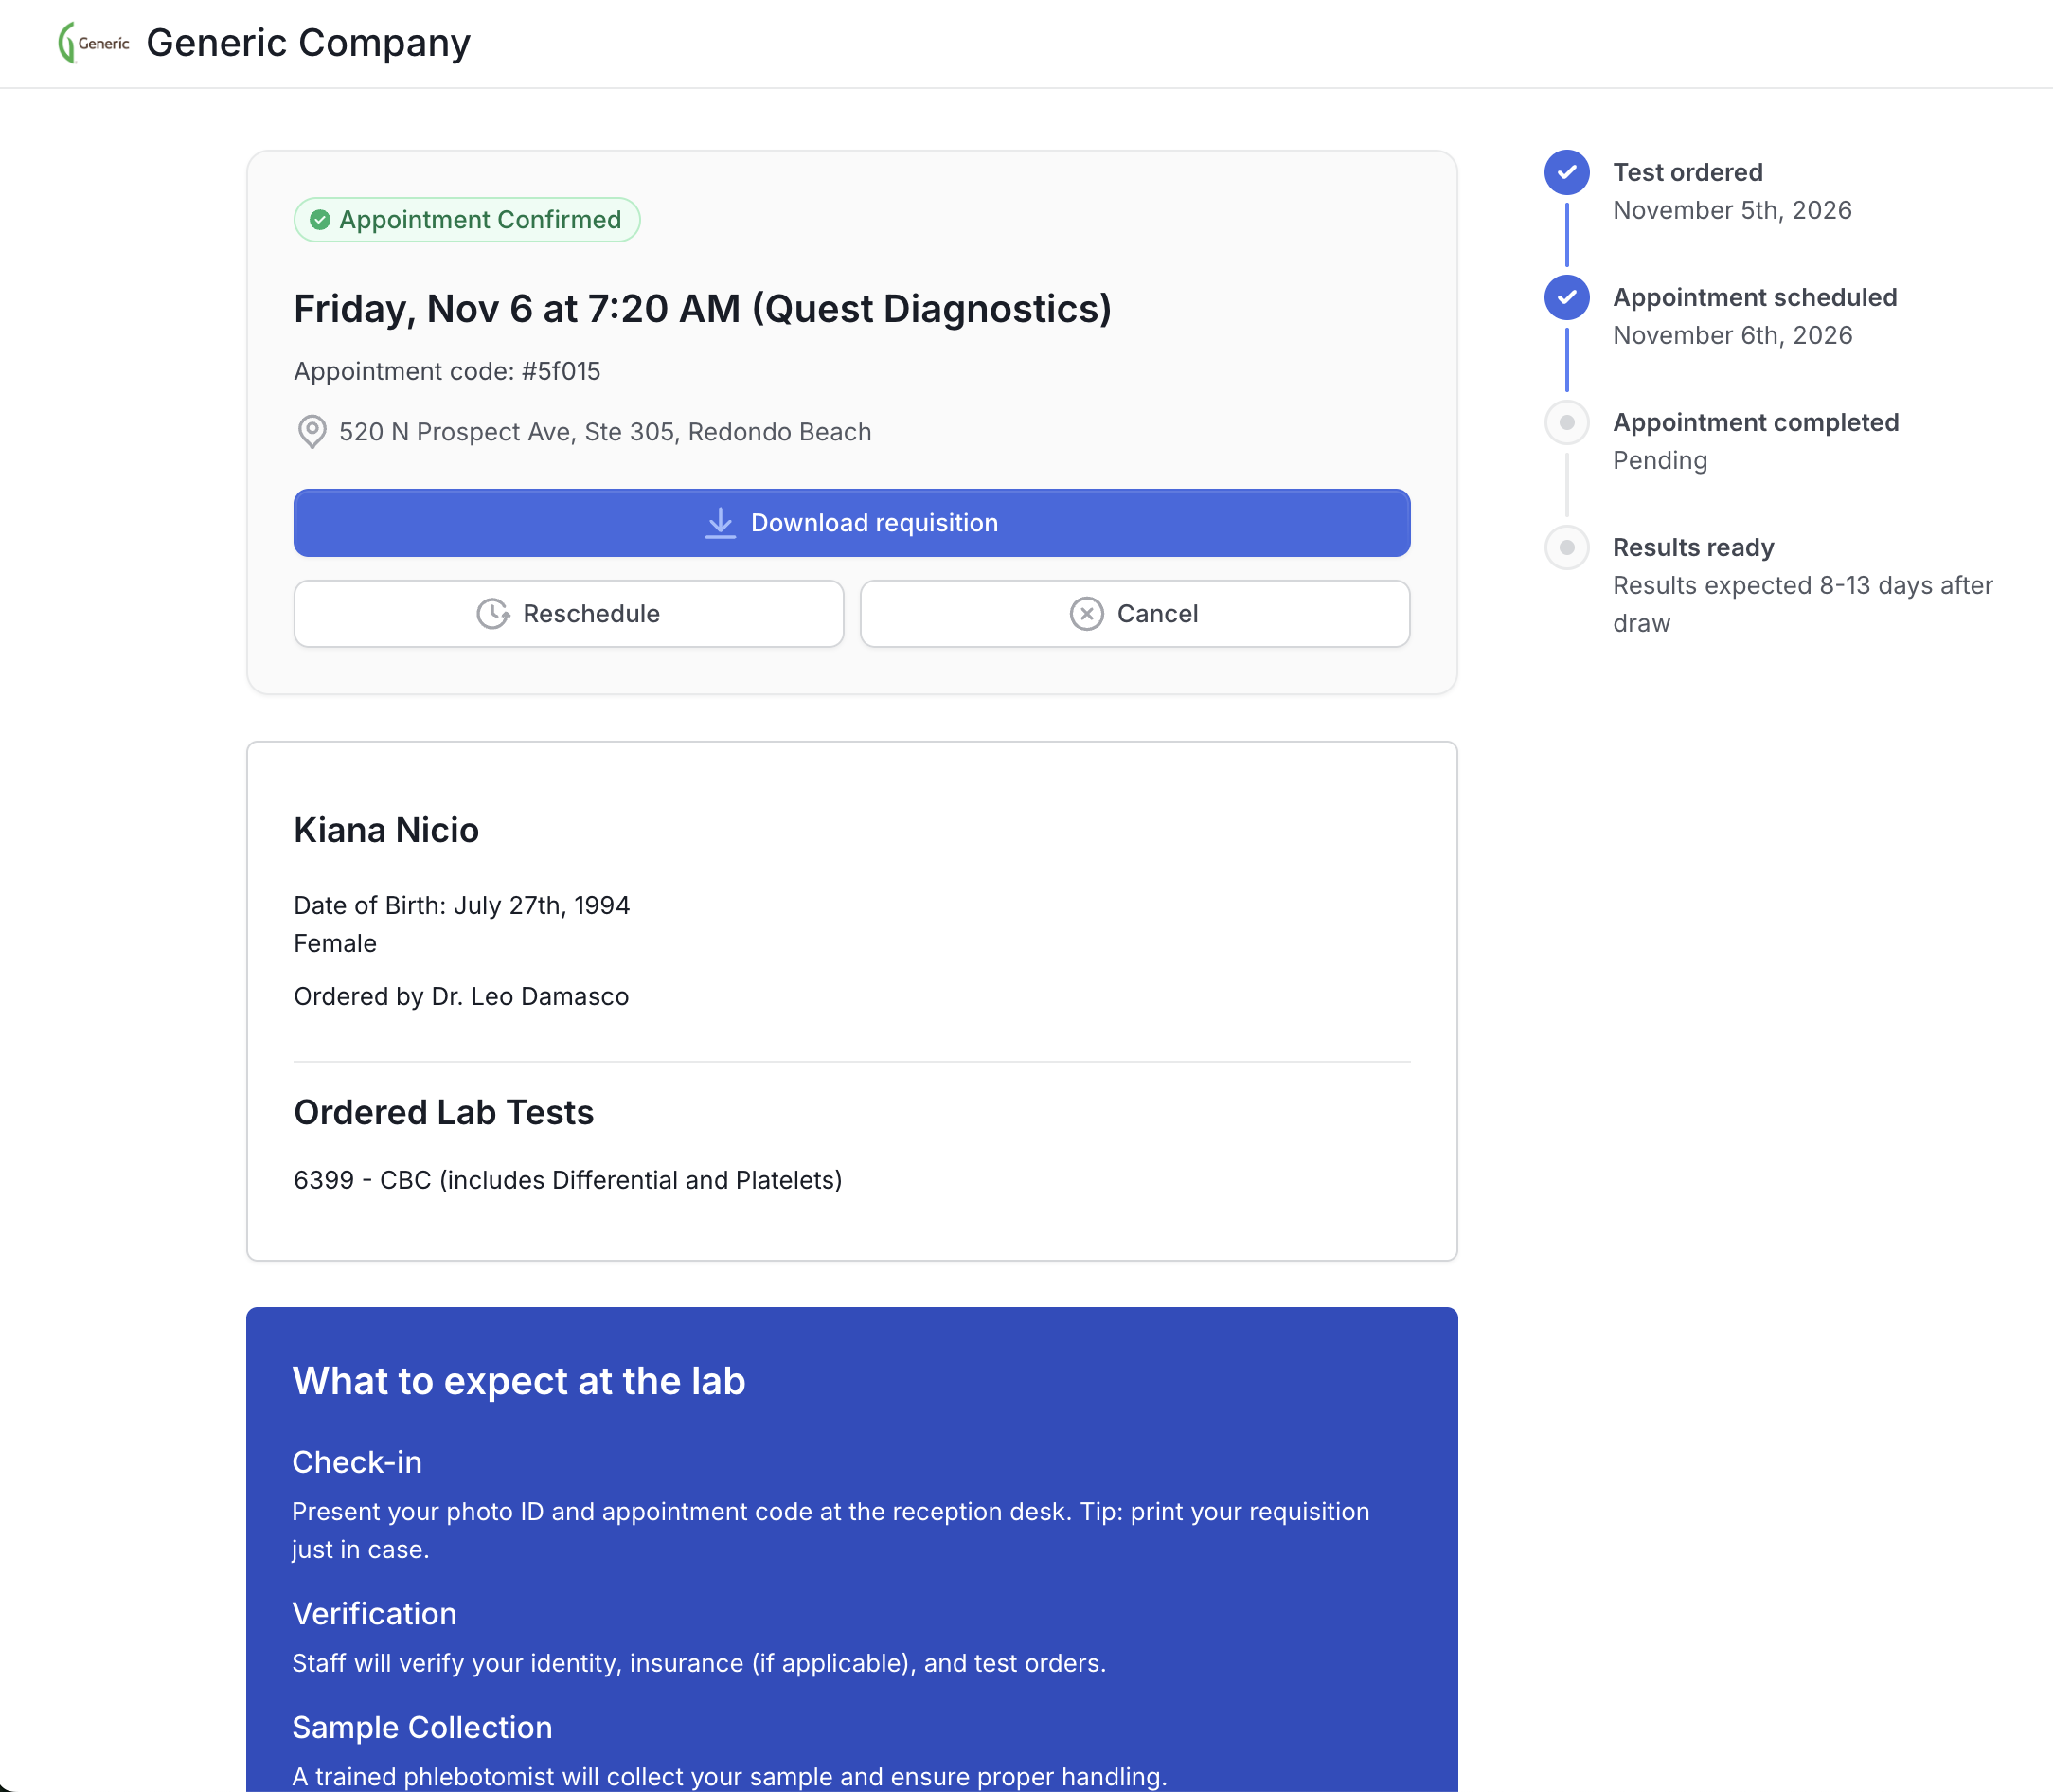
The patient can return to the Portal to:
Review appointment details
Download their requisition
Review preparation instructions
Reschedule or cancel an appointment
Supported Labs & Scheduling
Quest PSC scheduling is supported directly on-page
Availability is based on real-time Quest location data
For Labcorp and BioReference orders, the appointment booking button on the lab order page opens a new tab in the patient's browser for scheduling on the labs' external websites. Direct on-page scheduling is coming soon.
What the Patient Portal Does Not Do (Yet)
The Patient Portal MVP does not currently support:
Creating patient accounts or logins
Viewing lab results
Modifying lab orders
Billing or payment flows
Other collection modalities outside of lab PSCs (for example, at-home phlebotomy or on-site collection orders)
The Portal is intentionally focused on helping patients complete the collection step successfully by scheduling a convenient draw appointment and answering common questions about what to expect at the lab.
Branding & White-Labeling
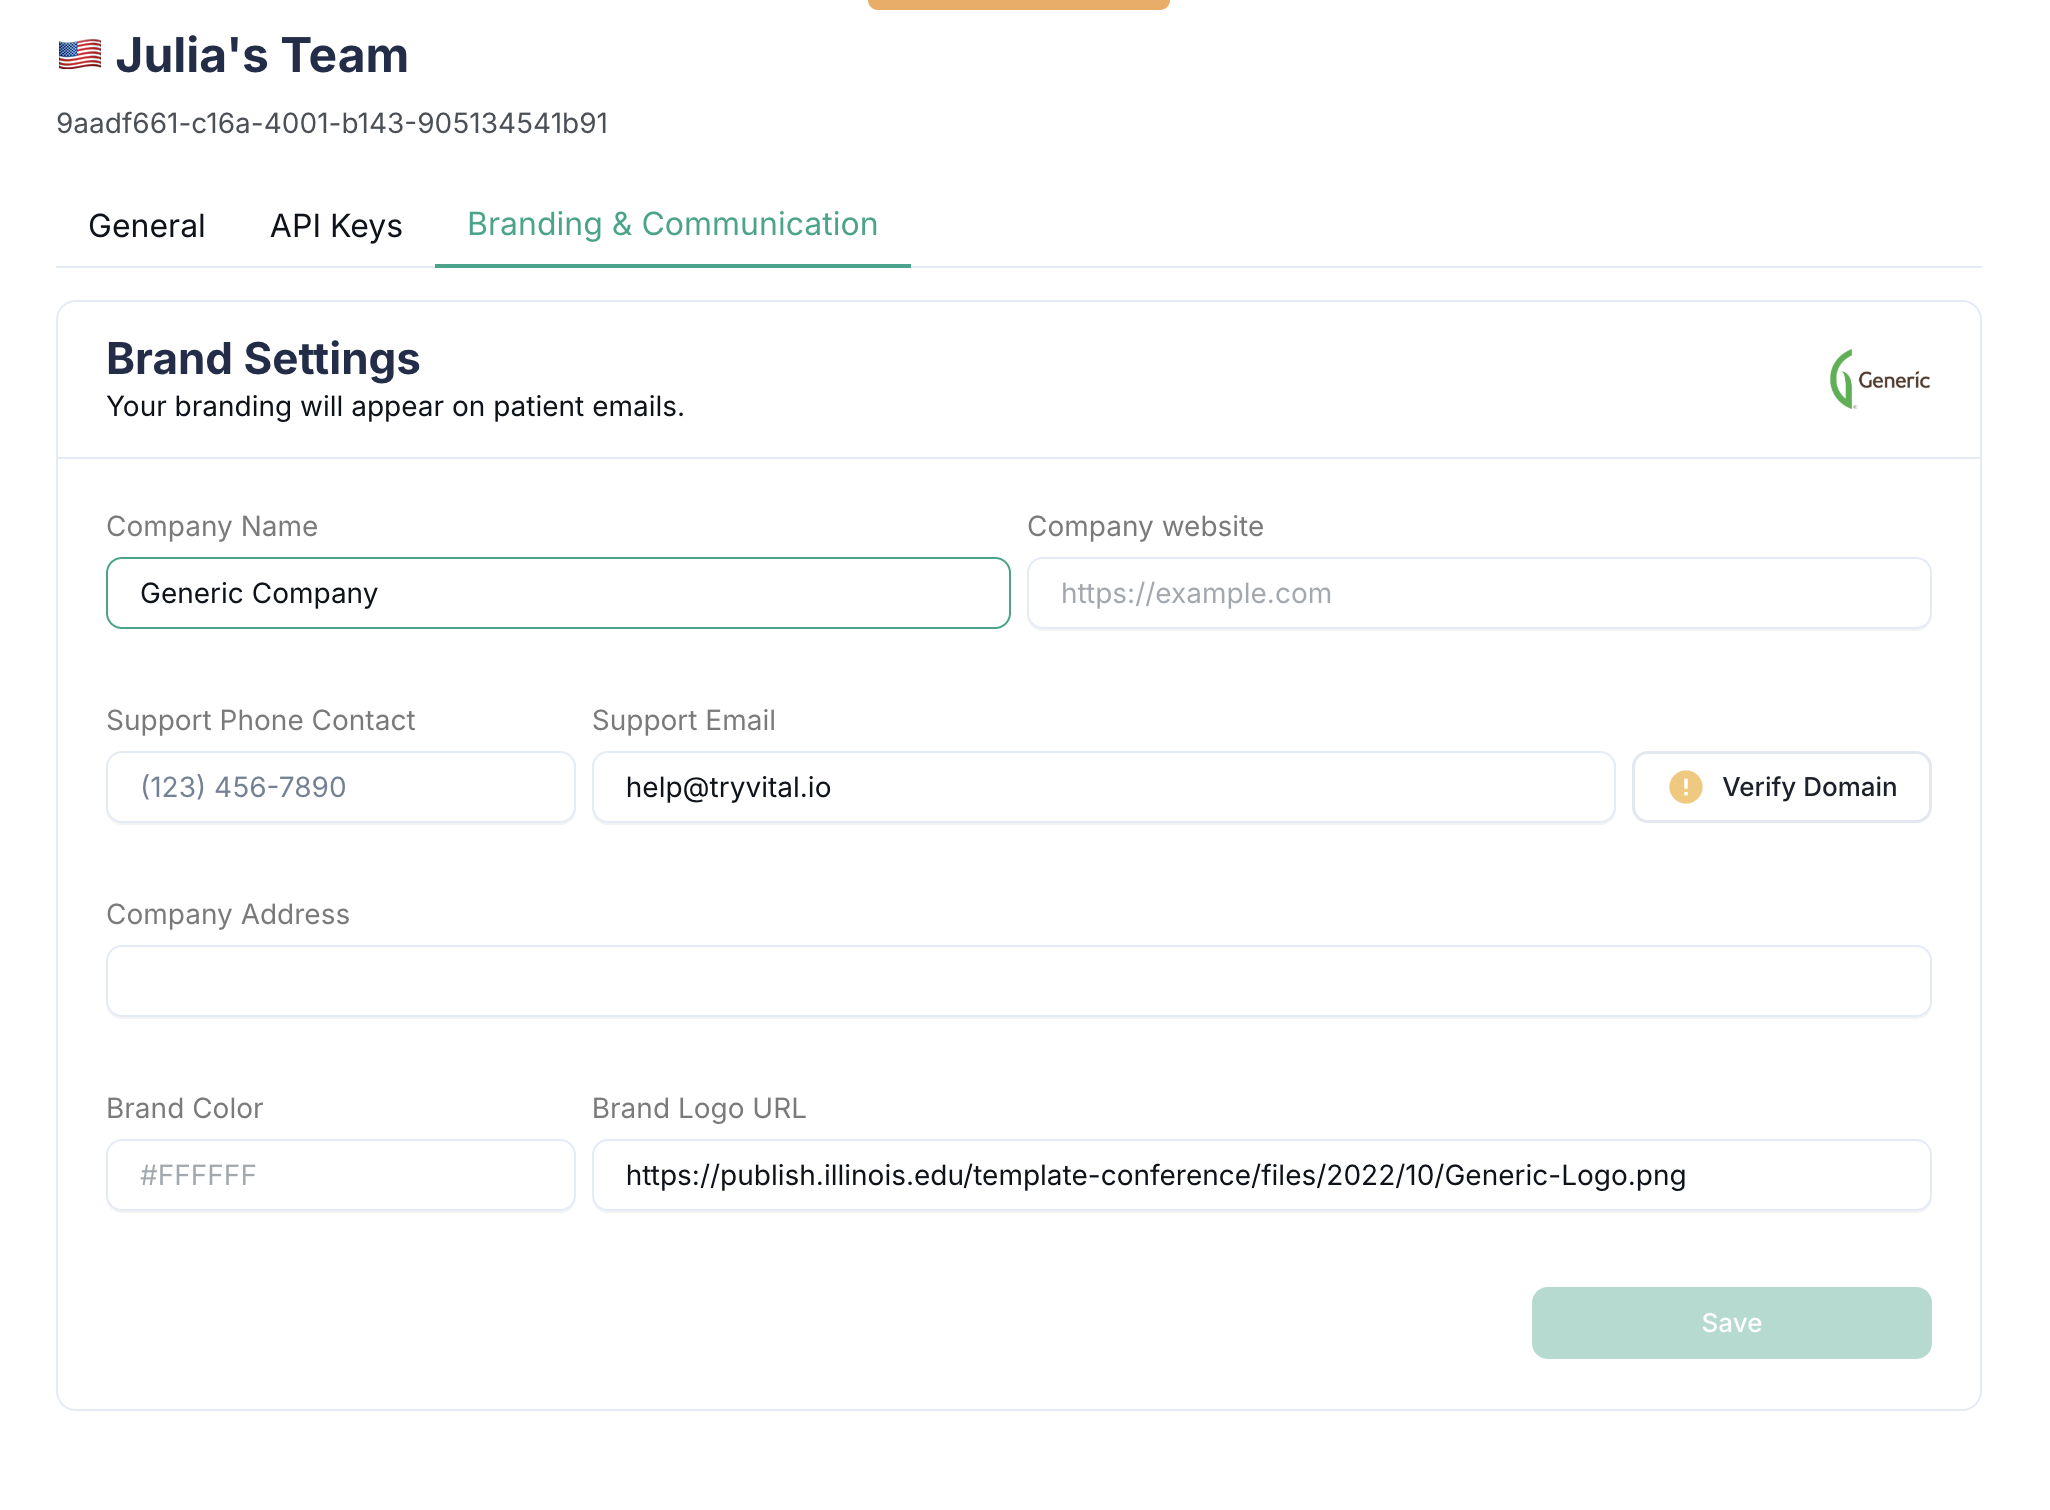
The Patient Portal inherits your configured brand settings in Junction (the same settings used for Junction email communications)
Set these in Team settings > Branding: company name, support email, brand color, and brand logo
The support email powers the Portal's "Get in touch" button, so make sure it goes to an inbox your team monitors
For best results, choose a brand color of medium-to-dark lightness so text and buttons stay readable
The experience is branded, but hosted and maintained by Junction
No frontend work is required to launch.
Getting Started
You can turn on the Patient Portal yourself in a few minutes:
Set up your branding. In the Junction Dashboard, go to Team settings > Branding and fill in your company name, support email, brand color, and brand logo. Do this first so patients see your brand, not a blank or default experience.
Review your patient SMS. Go to Team settings > Communication > Walk-in lab and preview the Requisition created (portal link) message and reminders. Keep Junction's defaults or customize them.
Turn on the Portal. In Team settings, switch on the Patient experience toggle. New walk-in lab orders will include the Portal link in Junction's patient communications.
Test in Sandbox first. We recommend turning the Portal on in your Sandbox environment, placing a test walk-in order, and walking through the patient flow before turning it on in Production.
Optional: generate links via API. If you want to link to the Portal from your own product, use the Create Portal URL endpoint.
You can turn the Patient Portal off at any time with the same toggle. To turn on SMS appointment reminders, or if you have questions, reach out to your Customer Success Manager.